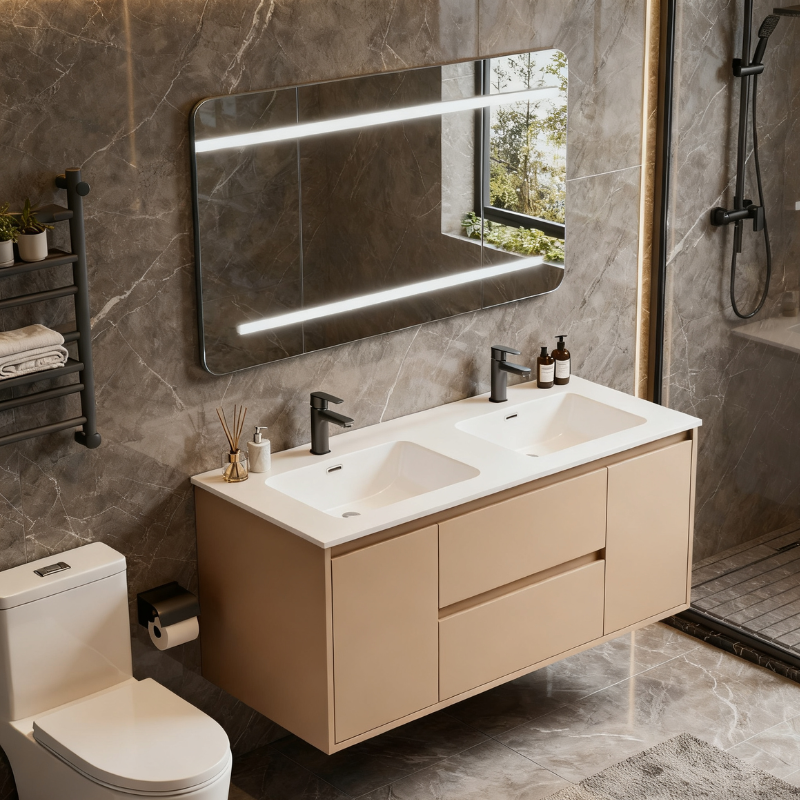
Repairing Bathroom Vanity Damage: Scratches, Chips, Dents and Water‑Related Issues
Published: June 30, 2026
▼ Table of Contents (Click to expand)
Introduction
Common Forms of Damage on Bathroom Vanities
Pre‑Repair Preparation: Tools, Cleaning Supplies and Safety Gear
2.1 Essential Repair Tools
2.2 Required Cleaning Supplies
2.3 Personal Safety Equipment
Step‑by‑Step Guidance for Scratch Repair
3.1 Minor Surface Scratches (Finish‑Only Damage)
3.2 Deep Scratches That Expose Base Substrate
How to Fix Chips and Dents on Cabinet Surfaces & Edges
4.1 Repairing Chips on Corners and Panel Surfaces
4.2 Removing Dents Using Steam and Filler Techniques
Troubleshooting and Repairing Different Levels of Water Damage
5.1 Surface Water Marks and Mineral Stains
5.2 Blistering and Bubbled Protective Finish
5.3 Panel Swelling and Edge Warping (MDF / Particle Board / Plywood)
5.4 Wood Degradation and Rot Issues
Full Vanity Refinishing Workflow to Restore Like‑New Appearance
6.1 Comprehensive Deep Cleaning
6.2 Uniform Light Sanding Across All Surfaces
6.3 Repair All Existing Defects in One Work Session
6.4 Re‑Stain or Base‑Coat Panels for Consistent Color
6.5 Apply Fresh Waterproof Protective Topcoat
6.6 Refresh Hardware for Visual Upgrade
Repair vs Full Vanity Replacement: Cost‑Benefit Decision Framework
7.1 Decision Table: When to Repair, When to Replace
7.2 Real‑World North‑America Cost Comparison Table
Long‑Term Preventive Maintenance Routine
8.1 Daily Quick Care Habits
8.2 Weekly Inspection & Cleaning Tasks
8.3 Monthly Check‑Ups for Plumbing and Seals
8.4 Annual Deep Maintenance Work
8.5 Costly Mistakes You Must Avoid
Key Differences in Repair Work for Different Base Materials
Conclusion
Introduction
Bathroom vanities continuously endure high‑humidity air, water splashes, harsh cleaning agents, cosmetic spills and accidental knocks from everyday household activity. Scratches, edge chips, dents, water stains and moisture‑caused degradation are extremely common for both residential and commercial bathroom cabinetry.
A large share of cosmetic and moderate structural damage can be successfully repaired with accessible DIY supplies, avoiding the high expense of complete vanity replacement. This practical guide walks homeowners, remodelers, property managers and importers through damage assessment, step‑by‑step repair procedures, refinishing workflows, cost comparisons and long‑term maintenance best practices. You will also learn critical material‑specific repair notes for plywood, MDF, particle‑board and solid‑wood vanity cabinets.
1. Common Forms of Damage on Bathroom Vanities
Before starting any repair work, perform a thorough visual inspection to classify damage type and severity. Different substrate materials react differently to impact and moisture, so correct identification prevents wasted time and failed repairs.
Damage Category | Typical Root Causes | Damage Severity Level |
|---|---|---|
Fine surface scratches | Keys, toiletry containers, cleaning cloth abrasion | Minor (cosmetic only) |
Deep gouge scratches | Hard sharp objects cutting through finish into base material | Moderate |
Edge chips | Impact from dropped toiletries, tools or heavy bathroom items | Moderate |
Compression dents | Dropped objects pressing wood fibers inward without breaking surface | Moderate |
Peeling / flaking finish | Age, repeated moisture exposure, poor original factory sealing | Moderate |
Bubbled, lifted coating | Persistent water contact penetrating underneath paint or veneer | Moderate‑Severe |
Panel swelling & edge bulging | Standing water, leaky plumbing contacting composite wood | Relatively severe |
Rot, soft substrate & mold growth | Unfixed long‑term water leaks behind or inside cabinet | Severe (structural risk) |
Hard‑water mineral stains | Tap‑water mineral residue building up on cabinet or countertop | Minor |
2. Pre‑Repair Preparation: Tools, Cleaning Supplies and Safety Gear
Gather all required items before commencing work. Working on a clean, dry vanity surface directly improves final repair quality. Ensure adequate ventilation in your bathroom workspace.
2.1 Essential Repair Tools
Assorted fine grit sandpaper: 220‑grit, 320‑grit, 400‑grit
Wood filler / two‑part epoxy repair compound
Furniture touch‑up markers and stain pens
Putty knife (plastic preferred to avoid scratching good surfaces)
Lint‑free microfiber cleaning cloths
Painter’s masking tape
Furniture repair wax / furniture paste wax
Polyurethane waterproof top‑coating
High‑quality paintbrushes for finish application
Household iron and clean damp cotton towels (for steam dent removal)
2.2 Required Cleaning Supplies
pH‑neutral mild all‑purpose cleaner
Isopropyl rubbing alcohol
Degreaser to remove accumulated soap and cosmetic oil residue
Baking soda (mild abrasive stain treatment)
Non‑gel plain white toothpaste for light water‑mark removal
2.3 Personal Safety Equipment
Disposable dust mask / particle respirator
Nitrile work gloves
Safety protective glasses for sanding and cutting operations
3. Step‑by‑Step Guidance for Scratch Repair
3.1 Minor Surface Scratches (Finish‑Only Damage)
Fine scratches only damage the outer protective coating without exposing bare wood or composite substrate.
Thoroughly clean the damaged zone: Wipe dust, soap scum and grease with a damp microfiber towel, then fully dry the area.
Apply matching furniture touch‑up marker: Select marker tone matching your vanity cabinet finish. Draw gently following scratch direction. For oak choose light‑toned markers; walnut and dark espresso cabinets require dark markers.
Polish and seal: Allow marker pigment approximately 10 minutes drying time. Buff softly with clean cloth, then apply thin layer of furniture paste wax. This procedure can conceal 80‑90% of light surface scratches.
3.2 Deep Scratches That Expose Base Substrate
Deep scratches cut past factory finish and reach raw wood / composite material, requiring filling and re‑sealing.
Light directional sanding: Use 320‑grit sandpaper and sand strictly along wood grain direction. Never sand cross‑grain, which creates new visible scratch marks.
Fill the scratch cavity: Press wood filler firmly fully inside scratch channel, level surface flat with putty knife. Allow curing for 30 minutes up to 2 hours, strictly following product datasheet drying guidance.
Final smoothing sanding: Switch to 400‑grit sandpaper to smooth filled spot until perfectly flush with surrounding panel surface. Remove all fine dust residue.
Color matching: Apply wood stain or touch‑up paint to match surrounding cabinet color tone.
Re‑establish waterproof protection: Apply polyurethane or bathroom‑grade waterproof wood finish over repaired location to restore moisture resistance.
4. How to Fix Chips and Dents on Cabinet Surfaces & Edges
4.1 Repairing Chips on Corners and Panel Surfaces
Chips commonly appear on cabinet door corners, drawer fronts and exposed vanity carcass edges.
Clean the chip area: Clear away loose splintered wood fibers, peeling old paint fragments. Keep chip boundaries neat and stable.
Fill defect cavity: Choose wood filler or two‑part epoxy repair compound. Press material firmly into chip void, leave filler sitting slightly higher than original surface level to account for shrinkage during curing.
Full curing period: Cure for 2‑24 hours, observe manufacturer instructions for your selected filler product.
Shape and sand down: Progress sanding starting from 220‑grit then move to 320‑grit sandpaper. Recreate original cabinet edge profile.
Color touch‑up and sealing: Stain or paint the repaired spot, then apply waterproof protective topcoat so repair blends invisibly with surrounding cabinet.
4.2 Removing Dents Using Steam and Filler Techniques
Dents happen when wood fibers get compressed without breaking open the surface layer; steam treatment can expand compressed fibers back toward original shape, ideal for solid‑wood cabinets.
Place damp towel: Lay clean damp cotton towel flat fully covering dent location.
Apply moderate heat with household iron: Set iron to medium temperature. Apply heat for short cycles of 5‑10 seconds each. Moisture from towel penetrates compressed wood fibers causing them to swell and rise.
Repeat cycles: Perform 3‑10 heating cycles, check progress each time until dent surface rises back close to original plane.
Note: Steam method has very limited effect on MDF and particle‑board substrates; use filler compound for dents on composite panels.
Final light finishing sand: Once surface fully cools and dries, smooth using 400‑grit sandpaper.
5. Troubleshooting and Repairing Different Levels of Water Damage
Moisture damage is the most frequent and challenging failure mode for bathroom vanities. Always locate and resolve water leak sources before executing any cosmetic repair work.
5.1 Surface Water Marks and Mineral Stains
Symptoms: White hazy water rings or dark discolored spots sitting only on top of cabinet finish.
Option 1 (Baking‑soda paste): Mix small quantity baking soda plus clean water to create mild abrasive paste. Rub very gently over stain area, then wipe residue away and dry completely.
Option 2 (Non‑gel toothpaste): White non‑gel toothpaste delivers gentle abrasion to erase light water marks without stripping intact finish.
5.2 Blistering and Bubbled Protective Finish
Bubbles form when water seeps underneath paint, UV‑coating or veneer layers.
Sand away all loose, bubbled and peeling finish material until reaching stable solid base substrate.
Inspect underlying panel carefully: confirm base material remains hard and structurally sound. If substrate feels soft or crumbly, simple surface repair will fail.
Complete refinish sequence: Apply primer coat → matching paint or stain → final waterproof clear topcoat.
5.3 Panel Swelling and Edge Warping (MDF / Particle Board / Plywood)
MDF and particle‑board suffer permanent fiber swelling once water penetrates un‑sealed cut edges. Plywood shows better moisture tolerance but will still swell under long‑term standing‑water exposure.
Minor swelling case: If bulging is small and material still rigid, carefully sand raised swollen edges flat, then fully re‑seal every exposed cut‑edge with heavy‑duty waterproof coating.
Severe swelling case: When panels are heavily bulged, soft, distorted or doors no longer fit correctly, sanding cannot restore original dimensions. Damaged individual panels or doors need full replacement rather than spot repair.
5.4 Wood Degradation and Rot Issues
Warning signs: Soft spongy wood texture, black discoloration, visible mold growth, musty odors inside vanity cabinet.
Eliminate water source first: Diagnose and fully repair leaking faucet connections, drain‑pipe joints or bad sink silicone seals. Repairs will quickly fail if leaks remain active.
Remove all rotted material: Cut and scrape away every section of soft, mold‑damaged substrate until you reach solid, sound wood.
Rebuild structure: Use epoxy wood repair compound to rebuild missing structural sections.
Sand smooth and refinish repaired zone.
Critical rule: If rot damage impacts more than approximately 30% of cabinet supporting structure, full vanity replacement is recommended for safety.
6. Full Vanity Refinishing Workflow to Restore Like‑New Appearance
When cosmetic damage covers multiple doors and panels, full refinishing delivers far better visual consistency than scattered spot repairs. Professional cabinet restorers follow this standard workflow.
6.1 Comprehensive Deep Cleaning
Remove mineral scale deposits, soap scum, grease and cosmetic oil residue across every cabinet surface. All surfaces must be completely dry before moving forward.
6.2 Uniform Light Sanding
Perform light consistent sanding over all exterior cabinet surfaces. This dulls old glossy finish, eliminates scattered minor scratches and creates proper surface profile for new paint or stain adhesion. Thoroughly wipe away all sanding dust.
6.3 Repair All Existing Defects in One Work Session
Repair every scratch, chip and dent all at once before applying new finish coats. Mixing spot repairs after refinishing creates patch‑work, uneven visual results.
6.4 Re‑Stain or Base‑Coat Panels for Consistent Color
Apply stain or bonding primer uniformly across doors, drawer fronts and cabinet carcass to achieve consistent base color tone.
6.5 Apply Fresh Waterproof Protective Topcoat
Select bathroom‑suitable polyurethane or moisture‑resistant clear wood finish. Multiple thin coats perform far better than a single thick heavy coat. This new layer forms the primary moisture‑defense barrier for your vanity.
6.6 Refresh Hardware for Visual Upgrade
Replacing handles, knobs, door hinges and drawer slides delivers huge visual improvement for older vanities at relatively low cost, even without modifying cabinet panels.
7. Repair vs Full Vanity Replacement: Cost‑Benefit Decision Framework
Not every damaged vanity is worth repairing. Structural failures mean replacement delivers better long‑term value.
7.1 Decision Table: When to Repair, When to Replace
Damage Condition | Repair Recommended | Replacement Recommended |
|---|---|---|
Minor scattered surface scratches | ✓ | |
Small‑size chips on doors or edges | ✓ | |
Light surface water stains / finish bubbling | ✓ | |
Localized cosmetic finish damage | ✓ | |
Single damaged cabinet door or drawer front | ✓ | |
Extensive MDF / particle‑board panel swelling | ✓ | |
Major cabinet carcass structural warping | ✓ | |
Large‑area wood rot and mold contamination | ✓ | |
Vanity age exceeds 15 years with widespread wear | ✓ |
7.2 Real‑World North‑America Cost Comparison Table
Work Item | Typical Cost Range | Notes |
|---|---|---|
DIY cosmetic repair & spot refinish | $20‑$100 | Materials‑only cost for homeowner |
Professional handyman repair work | $150‑$600 | Small‑scale targeted cosmetic fixes |
Individual cabinet door / drawer front replacement | $100‑$500 | Match existing cabinet finish |
Complete vanity unit replacement | $300‑$3000+ | Includes cabinet, countertop, sink; installation extra |
General practical guideline: If total projected repair costs exceed 50% of purchasing a comparable new vanity, replacement usually represents the smarter long‑term investment.
8. Long‑Term Preventive Maintenance Routine
Proactive maintenance drastically cuts future repair needs and extends vanity service life for both residential and commercial bathroom projects.
8.1 Daily Quick Care Habits
Immediately wipe away water splashes and standing water from countertop, cabinet fronts and edges
Clean cosmetic spills (hair‑dye, perfume, skincare liquids) right after they happen
Run bathroom exhaust fan during showers plus 15‑20 minutes afterwards to lower ambient humidity
8.2 Weekly Inspection & Cleaning Tasks
Clean cabinet surfaces with mild pH‑neutral cleaner
Wipe down door hinges and drawer‑slide hardware; remove accumulated soap residue
Quick visual check for early signs of water marks or peeling finish
8.3 Monthly Check‑Ups for Plumbing and Seals
Inspect supply lines and drain pipes underneath vanity for tiny hidden drips
Check sink‑to‑countertop silicone caulk; repair cracked or peeling sealant promptly
Open cabinet doors and check interior for musty smells or early moisture signs
8.4 Annual Deep Maintenance Work
Apply fresh furniture protective wax on wood‑finish vanity surfaces
Full inspection of all waterproof coating, edge banding and cabinet seams
Tighten loose hinge and drawer‑slide screws; replace worn‑out hardware components
8.5 Costly Mistakes You Must Avoid
❌ Leaving standing water sitting on cabinet edges, seams or countertop for extended periods ❌ Using steel‑wool pads which create fine embedded scratches ❌ Applying harsh acidic bathroom cleaners onto wood and composite cabinet finishes ❌ Poor bathroom ventilation allowing constant high‑humidity conditions ❌ Impacting cabinet corners with heavy bathroom objects
9. Key Differences in Repair Work for Different Base Materials
Repair techniques must adapt to cabinet substrate type; one method will not work equally across all vanity materials.
Solid‑wood vanities: Excellent repairability. Steam dent removal works well; sand, fill, stain and refinish repeatedly. Still requires full sealing against bathroom humidity.
Plywood vanities: Good repairability for cosmetic damage. Avoid deep sanding through veneer face layer. Swelling is usually localized; edges must always be fully sealed after repair work.
MDF / Moisture‑Resistant MDF: Surface scratches and chips can be filled. Swollen MDF cannot be sanded back to original dimension. Once edges swell, panel replacement is normally required.
Particle‑board vanities: Very poor moisture tolerance. Minor cosmetic scratches can be filled, but any water‑caused swelling is permanent, almost always requiring component replacement.
Conclusion
Scratches, chips, dents and moisture‑related damage are extremely common issues for bathroom vanities operating in humid bathroom environments. Most minor and moderate cosmetic damage can be successfully repaired with basic tools and clear step‑by‑step procedures. Fine scratches can be concealed with touch‑up markers and wax; chips and dents respond well to wood filler or steam treatment; water‑related problems range from simple stain removal all the way up to full component replacement for heavily swollen or rotted panels.
DIY spot repair or full refinishing often costs only a fraction of buying and installing a brand‑new vanity. However when cabinet carcass suffers serious structural swelling, widespread rot or mold contamination, replacing the vanity delivers safer, more reliable long‑term performance.
Consistent maintenance routines including wiping spills immediately, checking plumbing for hidden leaks, maintaining good bathroom ventilation and preserving protective surface coatings will greatly prolong your vanity service‑life. Always identify your cabinet substrate material before you start repair work, as MDF and particle‑board have important limitations when exposed to bathroom moisture.
Blog TDK (WordPress SEO)
Title: Repairing Bathroom Vanity Damage: Scratches, Chips, Dents & Water Damage Guide Meta Description: Learn DIY repair steps for bathroom vanity scratches, chips, dents and water damage. Compare repair vs replacement, plus material‑specific tips for plywood, MDF and solid‑wood cabinets. Meta Keywords: bathroom vanity repair, fix vanity scratches chips, vanity water damage repair, refinish bathroom vanity, plywood MDF vanity maintenance